I was thinking about silver leafing our bedroom lamps since I'm now an expert at silver leafing (that DIY to come next week!), but then I thought spray painting them turquoise might be fun. I tend to change my mind A LOT. Just ask my husband. And when I spied Dear Lillie's ruffled lampshade tutorial, I KNEW what I wanted to do with my "blah beige" lampshades.
Didn't my lamp turn out cute!
Didn't my lamp turn out cute!
Here's the before. Nothing really too exciting going on here. I like the shape of the base, but the color doesn't really fit in with my new shabby shic blue walls.
I am going to give you my tutorial, but Dear Lillie's tutorial is 10 times better than mine, so feel free to check her's out after you read mine. I won't be offended, honest ;-)
Supplies:
Fabric of your choosing. I used an old sheet.
Hot glue gun and glue sticks
Sewing machine, OR needle and thread
Tape measure
Scissors
Lamp Shade if you don't already have one
Instructions:
1. Measure the height of your lampshade. Mine was 11" tall.
2. Determine how many rows of ruffles you want. I went with three.
3. Now take the height of your shade and divide it by the rows of ruffles 11 / 3 = 3.66. 3.66 is the width of my ruffles. Why can't mine be an even number??
4. Because your want your ruffles to overlap a bit, add 3/4" to 1" onto the width of each strip. Because my strip is such a difficult number I just rounded it up to 4 3/4".
5. Now cut 3 strips of fabric. Since it's hard to guesstimate the length of your strip ruffled, it's best to cut a longer strip then you think you might need. I was cutting from a king sheet, and cut three trips the width of my king sheet. My bottom ruffle was actually the exact width of my king sheet once ruffled!
6. You can either use your sewing machine to gather your strips of fabric, or be lazy like me and gather your strips with a needle and thread while watching tv on the couch. Yes, folks. Sometimes I am just plain lazy! And I'm okay with that.
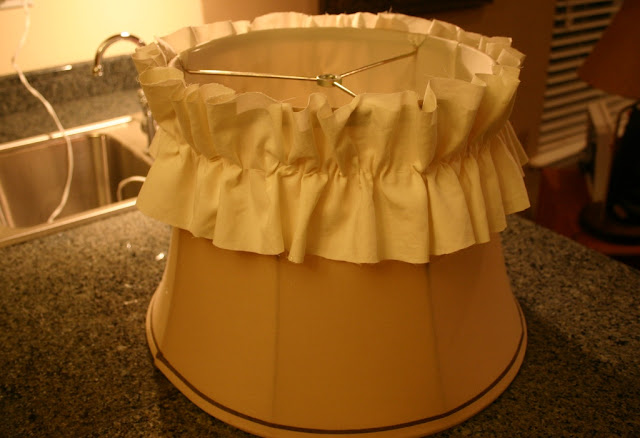
7. I gathered one ruffle strip and hot glued it to my lamp shade before ruffling the next strip. I started at the top of the shade and worked my way down.
Top row done! I added a few drops of glue to hold some of the ruffles in place along the top of my shade.
The finished shade! Isn't it too cute for words!!
Before & After. It's like Night & Day!
Now go make over a lamp! It's easy and fun!
Jenny


Easy...for you! As soon as you said it involved sewing, I knew I was out. I am inept in sewing...can't even do a decent button sew.
ReplyDeleteBut I can appreciate that that lamp is so darling! I love it. You could get old lamps at thrift stores, ruffle and paint them and sell them on Etsy.
Cute lamps Jenny. Are the ruffled edges finished, or just the cut edge?
ReplyDeleteAdrienne, sewing is not one of my strongest points! But I keep trying :)
ReplyDeleteBerta, I liked the rough cut look, so did not finish my edges. Plus, that would have required me to drag out the sewing machine!
Too cute!!
ReplyDelete