Showing posts with label DIY. Show all posts

Wednesday, November 30, 2011

Christmas Bingo Card

Here's a fun Christmas Bingo Card hanging that I created a few years ago.

The bingo card measures 5x7 and came in a kit I had purchased. I dug through my box of treasures to decorate the card, but you can find similar pieces at your local craft store or online. The photo is a favorite of mine. It's a photo of my mom Janet when she was a little girl and it appears that she has put Santa to sleep with her wish list for Christmas.

I punched a hole in each corner of the card and thread silver pipe cleaner through the holes to use as a hanger. And then I embellished the card with buttons, rhinestones, lace, glitter star and rhinestone button....


a pre-made flower, bottle brush Christmas tree, metal Joy word, a metal "tis the season!" label, garland, pom pom fringe, and crepe paper. I also matted the picture onto white card stock and cut a scallop edge with scissors and then outlined the photo with some silver glitter glue.


You can purchase a bingo cards online....

Source
Or also search the internet for Bingo Images or Clip Art. Here is one that I found in my search....


Source

This would make a fun topper for a special someone's Christmas present, or perhaps an ornament for the tree? I have mine hanging on our entertainment center in the family room.

Jenny

Tuesday, November 8, 2011

DIY Paper Christmas Trees

This is the first in a series of Christmas craft projects I plan to share with you in months of November and December. Christmas is my favorite holiday and as soon as November hits I am inspired to make all things Christmas.

I made these three trees several years ago. I was inspired by a Making Memories ad in Creating Keepsakes magazine. I can't remember which tree it was that Making Memories had featured, it might have been the fringe or loop one, but I knew I had to make my own.  And of course everything is better in threes!


Here's a close-up of the tree trees. The first is a loop version, the middle one a fringe tree, and the last is a collage of torn paper. All three are super easy and fun to make!


Supplies needed:

3 Styrofoam cones
1 wooden dowel cut into 3 pieces
3 pots for your base
3 Styrofoam half balls
 Moss from your floral dept.
3 different kinds of ribbon
Hot glue gun
Glue or adhesive
Scissors
Jingle bells & Pom poms
Decorative ribbon and trim for collage tree, as well as dowels
Assortment of Christmas scrapbook paper


To create the loop Christmas Tree strips:

Cut a 3" x 12" strip of scrapbook paper and fold it in half and secure with adhesive at the top. With scissors, cut strips from the looped bottom, to just about 1/2" from the top.


To create the fringe Christmas tree strips:

 Cut a 2" x 12" strip of scrapbook paper and fold it in half and then in half again. With scissors, cut thin strips to just about 1/2" from the top. Unfold and you now have one long strip of fringe.


To create collage Christmas tree pieces:
(sorry, no picture)

Tear random pieces and strips of scrapbook paper or scraps in various sizes and shapes.


The create the loop and fringe tree:

Starting from the bottom of your styrofoam cone, wrap the tree one strip at a time, securing with adhesive or glue. Trim the strips to length as you work your way up the tree.

To create the collage tree:

Wrap your stryofoam cone in some plain paper and secure with adhesive or glue. Now for the fun part, start gluing and overlapping the torn pieces of paper until you have covered every inch of the cone. Add some trim and ribbon to the bottom of the cone and secure with hot glue or pins.

To assemble your trees:

1. Now take your three pots and place a half styrofoam ball in each.

2. Cover the exposed styrofoam ball with moss using hot glue.

3. Take a dowel and stick it through the center of the sytrofoam ball.

4. Take your tree topper and stick it through the top of the dowel.

5. If either end of the dowel feel loose, secure with hot glue.

6. Wrap each dowel with ribbon and secure with hot glue or adhesive.

7. Add a bell or pom to the top of your trees.

8. Now stand back and admire your craftiness and display your trees for all to see!


Jenny

Monday, October 31, 2011

Embroidery Hoops DIY

Who knew embroidery hoops, with some fun fabric, could be turned into wall art? I don't care if everyone else with a nursery has them hanging on their walls. I just love them so!


Most of you could probably figure out how to makes these if  you wanted to, but I'll give you my DIY anyway....

Supplies:

1. An assortment of wooden Embroidery Hoops from your local fabric, craft or thrift store. I used to be big on cross-stitching and had quite a few hoops collecting dust in the closet.

2. An assortment of colorful fabric.

3. Scissors.

4. Hot Glue Gun.


First off, let me just tell you to please ignore the string tied around the hoop. I was planning to use the string to hang the hoop to the wall, but the string needed to be higher, and I found a much easier way to hang the hoops. I never claimed to be perfect ;-)

Step 1. Take your hoop apart and place your fabric over the "inside" hoop. Next place the "outside" hoop on top  of the fabric over the "inside" hoop. Tighten the "outside" hoop.


Step 2. Trim the fabric approx.  a half an inch from the edge of the hoop, leaving enough length to glue the fabric to the inside of your hoop.


Step 3. Place a small amount of hot glue to the inside of your hoop and fold the fabric over, gluing the fabric to the inside of the hoop.


Step 4. Finish gluing your fabric all the way around.


Step 5. Voila! You now have a pretty fabric covered embroidery hoop. Continue steps for the remainder of your hoops.


I decided to used some scraps of fabric to create a monogram "I" for Isabel. I sewed each piece on with some embroidery thread. And then hand embroidered "I is for Isabel" in blue embroidery thread, although it's kinda hard to see in the photo.


And the finished project once again.  I'm really pleased with how they turned out.


Stay tuned for my next post later this week, where I will give you a sneak peak of the nursery progess and how the hoops look hanging above the crib.

Jenny

Thursday, June 9, 2011

DIY: Faux Flower Arrangement

Here's the last in the series of DIY projects from my bedroom make-over.
This project is super simple.
No crafty skills needed, I promise!


Supplies:

Base (vase, candle holder, urn, even a rinse cup from the bathroom section of Target)
Realistic fake flower bouquet
Styrofoam ball that fits inside your base
Glue gun -but not required


I like to purchase a flower bouquet with a lot of flowers on it and one that has both large and small rose buds.


Next, using scissors or a wire cutter, clip several flowers off just at the base, leaving a small stem.


My base is actually a rinse cup that I found in the bathroom section of Target. Candle holders make great bases too.


Styrofoam balls come in all sizes and can be purchased from Michael's, JoAnne's or your local craft store.


I chose to just place my styrofoam ball inside my base and not glue it in with a glue gun. Depending on how well your styrofoam ball fits in your base, you may want to secure it with some glue. I then started at the top center of the ball and stuck the stem of each flower into the styrofoam, working my way around until the ball was filled in.


Easy Peasy!


Here are some other flower arrangements I have made...


These faux flower arrangements are a fun way to dress up a shelf, dresser, or bathroom, with flowers that never wilt. And they are also easy to clean, just blow them with your hair dryer.

Jenny

Tuesday, May 24, 2011

DIY: Silver Leaf Jewelry Cabinet

If I had to choose between a recent favorite project of mine, it would have to be a tie between this project and my newly stenciled wall. Both projects were such a transformation and the end results still have me beaming with satisfaction. That's my kind of high!

Here is how my silver leafed jewelry cabinet turned out. Doesn't it shine like a jewel?


Here is the before. A dark cherry wood stain. Nice, but nothing that would make you stop and take a second look.


How did I accomplish this transformation you ask?

Well here are the details...


Supplies:

 LeFranc 3 hour Size

3 - 25 sheet booklets of aluminum leaf,
that's how many I needed for my project.

Small soft bristle brush

Small foam brush


DIY:


1. First, I printed out this tutorial on how to silver leaf a dresser since I knew nothing about silver leafing something of this size! This is also the same tutorial that inspired me to try my hand at silver leafing.

2. Next, I disassembled the cabinet in the garage and spray painted the the frame and areas that were to be mostly covered silver. No reason to unnecessarily leaf these parts of the cabinet since they were barley exposed.


3. I  then spray painted the hardware silver and let it dry before unscrewing it from the drawers and doors.


4. To adhere the aluminum leaf squares to the cabinet, I applied what is called "size" with a foam brush to the cabinet. It basically acts as a glue that once dried to a "tack", or tacky to the touch, allows you to lay down the silver leaf and adhere it to the piece. I purchased a 3 hour size, not realizing that the "3 hour" part meant that was how long it took the size to become tacky before you can apply the silver leaf. Apply your size in thin strokes. You do not want to apply a thick or goopy coat, if you do, it will only take the size longer to reach "tack".


5. Silver leafing is MESSY! And I highly recommend doing this project in the garage. The aluminum leaf sheets I bought came in a booklet of 25, with a piece of tissue in between each leaf. Very carefully, hold the booklet just above the area you want to apply the leaf, pull out a sheet and lay it down and smooth the leaf out with a soft brush moving the brush in a circular motion. You can also use your fingers to smooth out the leaf. Experiment and see what works best for you. Aluminum leaf is very fragile and WILL break apart. Don't fret! Just lay the broken pieces onto your piece and blend them in with your brush or finger. Also, overlap the sheets just a bit so they blend in better.


This project actually took me two weekends to finish, mostly because I had to wait 3 hours for the size to reach tack, and then because I picked a piece with a TON of drawers and surfaces! But the time and effort was SO WORTH IT!!


I choose to embrace the cracks and "imperfections" in my piece. I think it adds that old vintage feel and gives it character.


Here's a close-up of the drawers.


And the legs, they turned out the best I think.


A side-by-side comparison. Such a transformation!


Here are a few things I learned during this project...

If you feel the urge to sneeze, sneeze away from the silver leaf!

Imperfections = character. And character is good.

If you are working on a large piece like I was, do not apply size to all the pieces at once. You risk the size loosing it's ideal tack before you can apply the silver leaf to all the pieces. Rather work in chunks.

Clean you brush often by wiping it onto a clean cloth.

It's easiest to rub small pieces of the leaf into cracks with your fingers.

Tackle large jobs over several days. Pace yourself. Remember, it took me two weekends to finish silver leafing my cabinet.

Kneeling on a concrete slab floor is hard on your knees. I finally got smart on day two, and stood the pieces on a table so that I didn't have to kneel over.

Leafing is messy and will get everywhere. But it is also fun!


 Jenny


Wednesday, May 18, 2011

DIY: Ruffled Lampshade

I was thinking about silver leafing our bedroom lamps since I'm now an expert at silver leafing (that DIY to come next week!), but then I thought spray painting them turquoise might be fun. I tend to change my mind A LOT. Just ask my husband. And when I spied Dear Lillie's ruffled lampshade tutorial, I KNEW what I wanted to do with my "blah beige" lampshades.

Didn't my lamp turn out cute!


Here's the before. Nothing really too exciting going on here. I like the shape of the base, but the color doesn't really fit in with my new shabby shic blue walls.


I am going to give you my tutorial, but Dear Lillie's tutorial is 10 times better than mine, so feel free to check her's out after you read mine. I won't be offended, honest ;-)

Supplies:

Fabric of your choosing. I used an old sheet.
Hot glue gun and glue sticks
Sewing machine, OR needle and thread
Tape measure
Scissors
Lamp Shade if you don't already have one


Instructions:

1. Measure the height of your lampshade. Mine was 11" tall.

2. Determine how many rows of ruffles you want. I went with three.

3. Now take the height of your shade and divide it by the rows of ruffles 11 / 3 = 3.66. 3.66 is the width of my ruffles. Why can't mine be an even number??

4. Because your want your ruffles to overlap a bit, add 3/4" to 1" onto the width of each strip. Because my strip is such a difficult number I just rounded it up to 4 3/4".

5. Now cut 3 strips of fabric. Since it's hard to guesstimate the length of your strip ruffled, it's best to cut a longer strip then you think you might need. I was cutting from a king sheet, and cut three trips the width of my king sheet. My bottom ruffle was actually the exact width of my king sheet once ruffled!

6. You can either use your sewing machine to gather your strips of fabric, or be lazy like me and gather your strips with a needle and thread while watching tv on the couch. Yes, folks. Sometimes I am just plain lazy! And I'm okay with that.

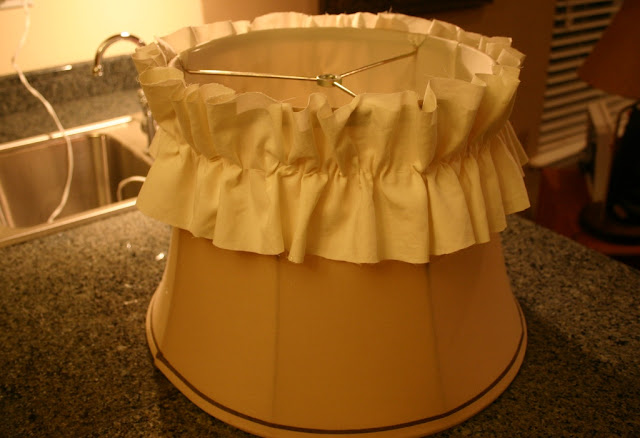
7. I gathered one ruffle strip and hot glued it to my lamp shade before ruffling the next strip. I started at the top of the shade and worked my way down.


Top row done! I added a few drops of glue to hold some of the ruffles in place along the top of my shade.


The finished shade! Isn't it too cute for words!!


Before & After. It's like Night & Day!


Now go make over a lamp! It's easy and fun!

Jenny

Tuesday, May 10, 2011

DIY: Stenciled Wallpaper

When I think of stencils, I tend to think of the folk art kind. You know, hearts and ducks and country. But then one day while blog hopping, I stumbled upon Carmel's beautifully stenciled dining room on her blog Our Fifth House

Isn't her dining room just gorgeous!


I quickly visited Olive Leaf Stencils on Etsy where she bought her stencil, and saw this stencil...


Which got the wheels turning in my head that the wall behind our bed would be perfect for a stencil!

See, this is how my mind works....I see an idea, fall in love, obsess over said idea, until I have to get it out of my system and just do it! This is what my poor husband has to live with every.single.day. Don't feel too sorry for him though, because he lives to give me grief over my OCD (Obsessive Compulsive Decorating). Trust me.

Anyway, my mind wasn't 100% made up on stenciling our bedroom wall, that is until I saw this beauty


It was official. I was head over heels in love with this dramatic, over-sized damask stencil. Add to cart. Done!

Meanwhile...back at the ranch (okay, I don't actually live on a ranch, altho' the field we built our house on used to house cows, so I guess it was a ranch at one time), I had not yet told Jim what my plans were for our bedroom. Instead I hung the above picture on our bedroom wall and waited for him to notice. Aren't I cute ;-)

Okay, now for the tutorial.....
Because I had no idea whatsoever on what I was doing, I searched the internet and lots of blogs for stenciling tips. Kate over at Centsational Girl has a great post on tips for stencils. Some of the tips I used, and some I didn't.

Supplies:
Stencil
Re-positionable Spray Adhesive
Painters Tape
Paint
Paint Tray
Brush or roller (I used a special roller for the metallic paint I bought)
Wet rag for clean-ups
Patience and a free weekend!

Tips:
(these are the ones that worked for me)
1. Find the center of your wall and mark it with a pencil or a piece of painters tape. I started from the center of our bed, even though that wasn't the center of the wall, because our bed is centered in the arches. You want to start from the center of the wall so that your stencil design is evenly painted over the span of the wall. If you start from one corner, the far corner where you end your stencil may look "wonky" and "off". So start from the center.

2. Lightly - Medium spray the back of your stencil with re-positionable spray adhesive. This will help hold your stencil to the wall, which was very important for my oversize stencil - mere tape around the corners would not have been enough. You should be able to paint several stencils before having to reapply more spray adhesive.

3. Now find the center of your wall, and position your stencil center of your mark. Use painters tape to secure the edges and corners of your stencil to the wall, as the spray adhesive is not enough "stick" to hold your stencil in place.


4. Now here is the fun and scary (at first) part! Apply paint to your roller (or brush if you decide to go with a brush) in some paint and roll it over the stencil, filling in all the nooks and crannies. Many people recommend that you roll off some paint onto a paper towel before applying the paint to your stencil to prevent the paint from bleeding under the stencil. But because a) my wall color was light, as was my paint for the stencil, and b) my stencil did not have clean cut lines, I was not concerned with the paint bleeding. In fact, I rolled my roller through the paint several times before applying it to the stencil. NOW, this may or may not work for your stencil, so it might be a good idea to test your stencil and the amount of paint to apply on some cardboard before you commit it to the wall.


5. Allow the paint to dry to the touch before applying your next stencil, since you will be overlapping the stencil over the painted stencil. It might be a good idea to pick a warm day to do this project!


5. The next part is the trickiest part until you get it down, which you will, I promise. You need to line up the stencil with the stencil you already painted. There should be little cut-out markers on the corners and sides of your stencil. I circled the marks on my stencil in yellow so you can see what I'm talking about. The tricky part is figuring our where the cut-outs line up with the painted stencil. I swear this took me a good 5 minutes to figure out, but once I did, the rest were easy-peasy!


6. I painted 4 stencils in a diamond shape, so that I didn't have to wait as long for the paint to dry before applying the next stencil. Once I had 4 stencils painted, I then painted one side, and moved my stencil to the other side, and when I was done painting that side, I usually only had to wait a short while before the other side was dry.


7. The next, and last tricky part, was figuring out how to position the stencil and paint into the corners. This took some experimenting, and a few dropped stencils on my head. What I did was line up my stencil, apply fresh tape to the bottom and sides of the stencil, and hold the stencil in place with one hand while I quickly secured the top half of the stencil to the ceiling or other wall. As you can see in the below picture, the top half of the stencil is not smooth and tight. Don't worry about this. Roll your paint into the bottom half of the stencil and when you are ready to work the paint into the corner of the stencil, with your roller still in place on the stencil, release the top half of the stencil so that it is no longer taped to ceiling, and roll your roller as far into the corner as you can. Clear as mud?


Above the bed is done! I cheated and did not go behind our bed, since our bed will always be in this spot, and there really was no reason for me to make more work for myself. I am all for shortcuts if I can take them!


Here's a picture of how I cut in the stencil on one of the corners. It's near impossible to cut the stencil completely into the corner. The only way I would see being able to cut into the corner, was by cutting my stencil in half, which I was not about to do.


And here's a picture of how I cut it into the baseboard, which you will have to excuse in this picture. This section of the baseboard is normally hidden behind a bedside table.


Almost done!


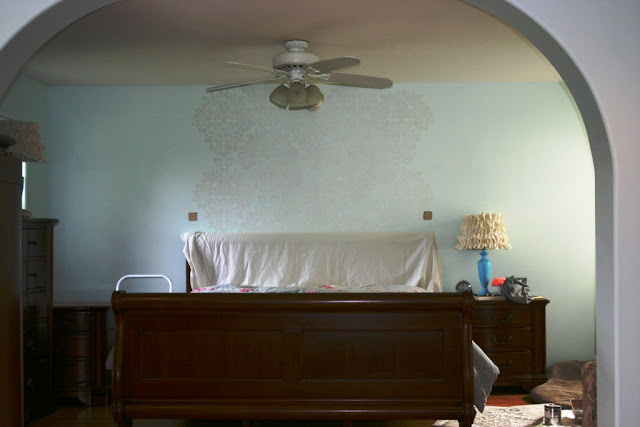
 Ta Da! Finished. Definitely worth a day and half worth of work! Sorry for the poorly lit picture. Go here to see the after pictures of how the rest of the bedroom turned out.


This project cost me under $100 to do. The most expensive purchase was the stencil at $49. And then the Martha Stewart's Precious Metals paint at around $18.

Stenciling was not as hard as I had imagined it would be. All you need is a free weekend and some patience. It's really easy once you get the first few stencils down. If I can do it, anyone can!

Jenny


Related Posts Plugin for WordPress, Blogger...